Category Archives: Tutorials

Posts about Meaningcloud’s tutorials.

RapidMiner + Python + MeaningCloud = 🚀

Integrations with third-party software are something extremely useful: they allow you to use technology outside the tool you are using, giving you additional features outside its core functionality or just providing auxiliary tools to make your day to day easier.

One of the downsides is that you are limited by the functionality the integration provides. Usually, this is not much of a problem as standard integrations tend to cover the most common use cases, but in the case of tools that can be used in many scenarios, these uses cases may not be exactly what you need or want for your application.

MeaningCloud is not an exception to this. We provide many different APIs, each one of them with several types of analyses and with tons of possible applications. It’s not surprising that not all of them are included in MeaningCloud’s extension for RapidMiner.

mc+python+rm

If you want something like the global polarity Sentiment Analysis provides, then the extension for RapidMiner has you covered, but it may not be the case for other analyses. It can go from wanting to use a MeaningCloud API not included in the extension such as the Summarization API or to something as small as needing the label of the resulting categories in an automatic classification process instead of the code the extension provides.

Last year, RapidMiner published a new Python scripting extension: Execute Python. This operator allows you to run a Python script in RapidMiner, which enables you to include any processing you want and can code in a Python script in your RapidMiner process.

Using this new functionality and MeaningCloud’s Python SDK, we can create a Python script to use any of MeaningCloud APIs directly from RapidMiner. The SDK enables us to work with the API output easily and to extract whatever information we want to add to our RapidMiner processes.

Let’s see how we can do this! Continue reading


Tutorial: create your own deep categorization model

As you have probably know by now if you follow us, we’ve recently released our new customization console for deep categorization models.

Deep Categorization models are the resource we use in our Deep Categorization API. This API combines the morphosyntactic and semantic information we obtain from our core engines (which includes sentiment analysis as well as resource customization) with a flexible rule language that’s both powerful and easy to understand. This enables us to carry out accurate categorization in scenarios where reaching a high level of linguistic precision is key to obtain good results.

In this tutorial, we are going to show you how to create our own model using the customization console: we will define a model that suits our needs and we will see how we can reflect the criteria we want to through the rule language available.

The scenario we have selected is a very common one: support ticketing categorization. We have extracted (anonymized) tickets from our own support ticketing system and we are going to create a model to automatically categorize them. As we have done in other tutorials, we are going to use our Excel add-in to quickly analyze our texts. You can download the spreadsheet here if you want to follow the tutorial along. If you don’t use Microsoft Excel, you can use the Google Sheets add-on.

The spreadsheet contains two sheets with two different data sets, the first one with 30 entries, the second one with 20. For each data set, we have included an ID, the subject and the description of the ticket, and then a manual tagging of the category it should be categorized into. We’ve also added an additional column that concatenates the subject and the description, as we will use both fields combined in the analysis.

To get started, you need to register at MeaningCloud (if you haven’t already), and download and install the Excel add-in on your computer. Here you can read a detailed step by step guide to the process. Let’s get started! Continue reading


Easy Text Analytics using MeaningCloud’s Zapier integration

We at MeaningCloud love Zapier. It lets us build workflows connecting email, Slack, etc. We wanted to contribute our bit to its ecosystem, so we created MeaningCloud’s Zapier integration. Thanks to it, we can perform Text Analytics in any Zapier workflow easily.

Many organizations use workflows to automate tasks. Chat rooms and bots are a common way of triggering events. For instance, the Slash commands in Slack or Hubot respond to well-formed commands with strict patterns to avoid ambiguity, which is something desirable under some circumstances.

Zapier logo

Where these approaches do not fit specially well is, precisely, one of the most exciting aspects of using Text Analytics in automatization: it can react to the outside world. A company can analyze all communications received from clients, measure reputation, detect weaknesses, or even analyze the employee satisfaction. And all that information can be injected in an automated process and react conveniently.

In this article, we will learn how to integrate MeaningCloud in any Zapier workflow. Continue reading


Voice of the Employee Dashboard

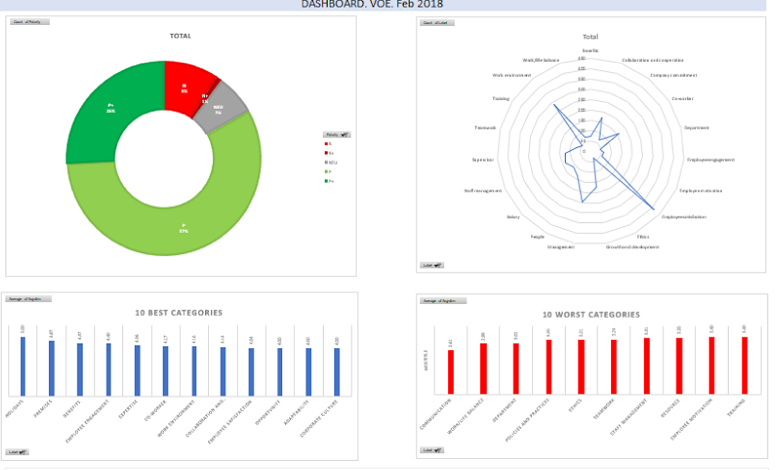
Voice of the Employee gathers the needs, wishes, hopes, and preferences of all employees within an organization. The VoE takes into account both explicit needs, such as salaries, career, health, and retirement, as well as tacit needs such as job satisfaction and the respect of co-workers and supervisors. This post follows the line of Voice of the Customer in Excel: creating a dashboard. We are creating another dashboard, this time for the Voice of the Employee.

Text-based data sources are a key factor for any organization that wants to understand the “whys”.

Continue reading


Voice of the Customer in Excel: creating a dashboard

Excel spreadsheets are still one of the most extended ways of working with big collections of data, especially among non-technical users. Two of our Vertical Packs, Voice of the Customer and Voice of the Employee, are particularly useful for typically non-technical teams, which can now carry out their analyses easily with our last Excel integration.

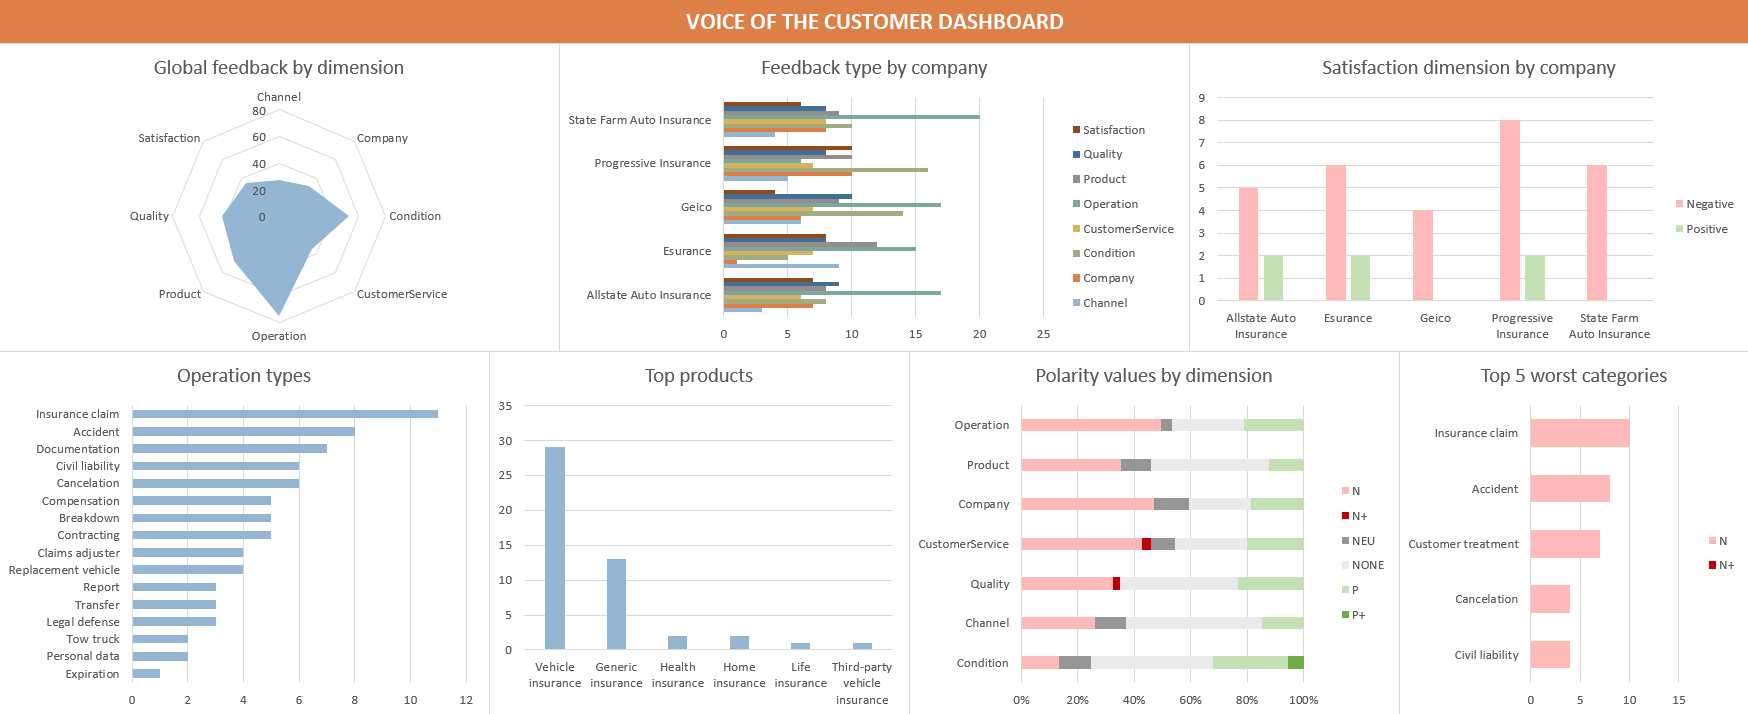
In this tutorial, we are going to show you how to use the add-in provided in the Voice of the Customer Vertical Pack, how to carry out a VoC analysis, and how to work with its output by creating a dashboard like the one on the right. Working with the Voice of the Employee Pack would follow a similar pattern.

[This post was last updated in February 2019 to include the updated ontology.]

dashboard general

A practical case

Let us imagine we work for a market research department or agency interested in analyzing the Insurance industry. Customer comments in forums and social networks constitute an extremely valuable source of spontaneous information about their opinions about insurance providers.
We are going to focus specifically on auto insurance reviews extracted from ConsumerAffairs, a website that collects reviews from several domains.

The reviews we are going to use have been extracted from the top five companies in the Auto Insurance section: for each one of them we’ve picked ten items. You can download here the Excel spreadsheet we will be working on. It contains a single sheet where we have included two columns: one with the selected reviews, and another with the name of the company they refer to.

As we have mentioned, for this tutorial we are going to use our Vertical Pack for Voice of the Customer analysis. Vertical Packs are a combination of preconfigured models or dictionaries, powerful APIs and specific add-ins for Excel that enable you to adapt text analytics to your domain with only one click. Just by registering at MeaningCloud, you have a 30-day trial for all Vertical Packs available. The trial starts the moment you first analyze a text, so users that have been using MeaningCloud for a while will also be able to try it out.

To get started, you need to register at MeaningCloud (if you haven’t already), request access to the Voice of the Customer pack and download and install the VoC Excel add-in on your computer. Here you can read a detailed step by step guide to the process.

Continue reading


RapidMiner: Impact of topics on the sentiment of textual product reviews

This is the second of two tutorials where we will be using MeaningCloud Extension for RapidMiner to extract insights that combine structured data with unstructured text. Read the first one here. To follow these tutorials you will need to have RapidMiner Studio and our Extension for RapidMiner installed on your machine (learn how here).

In this RapidMiner tutorial we shall attempt to extract a rule set that will predict the positivity/negativity of a review based on MeaningCloud’s topics extraction feature as well as sentiment analysis.

To be more specific, we will try to give an answer to the following question:

  • Which topics have the most impact in a customer review and how do they affect the sentiment of the review that the user has provided?

For this purpose, we will use a dataset of food reviews that comes from Amazon. The dataset can be found here.

Continue reading


RapidMiner: Relationship between product scores and text review sentiment

This is the first of two tutorials where we will be using MeaningCloud Extension for RapidMiner to extract insights that combine structured data with unstructured text. See the second one here. To follow these tutorials you will need to have RapidMiner Studio and our Extension for RapidMiner installed on your machine (learn how here).

In this tutorial we shall analyze a set of food reviews from Amazon. We will use the MeaningCloud sentiment API and try to see how users score products and whether their review description of a certain product corresponds to the score that they have assigned – more specifically we will try to see

  • How closely the review sentiment corresponds to the manually assigned score (which we already have available in our dataset).

The dataset that we will be using throughout the tutorial can be found here. First thing we need to do is download the CSV to our computer.

Continue reading


Text Analytics & MeaningCloud 101

One of the questions we get most often at our helpdesk is how to apply the text analytics functionalities that MeaningCloud provides to specific scenarios.

Users know they want to incorporate text analytics into their processes but are not sure how to translate their business requirements into something they can integrate into their pipeline.

If you add the fact that each provider has a different name for the products they offer to carry out specific text analytics tasks, it becomes difficult not just to get started, but even to know exactly what you need for your scenario.

homer-simpson-confused

In this post, we are going to explain what our different products are used for, the NLP (Natural Language Processing) tasks they are tied to, the added value they provide, and the requirements they fulfill.

[This post was last updated in October 2018 to include our new functionalities.]
Continue reading


Text Classification in Excel: build your own model

Customized Text Classification for Excel

In the previous tutorial we published about Text Classification and MeaningCloud’s Excel add-in, we showed you step by step how to carry out an automatic text classification using an example spreadsheet.

In this tutorial, we are going a bit further: instead of just using one of the predefined classification models we provide, we are going to create our own model using the model customization console in order to classify according to whichever categories we want.

We are going to work with the same example as before: London restaurants reviews extracted from Yelp. We will use some data from the previous tutorial, but for this one we need more texts, so we’ve added some. You can download the spreadsheet here if you want to follow the tutorial along.

If you followed the previous tutorial, you might remember that we tried to use the IAB model (a predefined model for contextual advertisement) to classify the different restaurant reviews and find out what type of restaurants they were. We had limited success: we did obtain a restaurant type for some of them, but for the rest we just got a general category, “Food & Drink“, which didn’t tell us anything new.

This is where our customization tools come in. Our classification models customization console allows you to create a model with the categories you want and lets you define exactly the criteria to use in the classification.

So how do we create this user model?
Continue reading


Text Classification in Excel: getting started

As you probably already know, Excel spreadsheets are one of the most extended ways of working with big collections of data. They are powerful and easy to combine and integrate with a myriad of other tools. Through our Excel Add-in, we enable you to add MeaningCloud’s analysis capabilities to your work pipeline. The process is very simple as you do not need to write any code.

In this tutorial, we are going to show you how to use our Excel Add-in to perform text classification. We are going to do so by analyzing restaurant reviews we’ve extracted from Yelp. If you have already read some of our previous tutorials, this first part may sound familiar.

To get started, you need to register in MeaningCloud (if you haven’t already), and download and install the Excel add-in on your computer. Here you can read a detailed step by step guide to the process.

Once you’ve installed it, a new tab called MeaningCloud will appear when you open Excel. If you click on it, you will see the following buttons:

excel add-in ribbon

To start using the add-in, you need to copy your license key and paste it into the corresponding field in the Settings menu. You are required to do this only the first time you use the add-in, so if you have already used it, you can skip this step.

Once the license key is saved, you are ready to start analyzing!
Continue reading